Adding Custom Buttons to the WordPress TinyMCE Editor
If you’ve ever been in the backend of a WordPress website, you’re likely familiar with the “what you see is what you get” (WYSIWYG) editor.
We’ve written before about adding custom formats to the WordPress WYSIWYG editor, like creating stylized buttons out of links, using the TinyMCE API. The API is a great way to extend usability, but the custom Formats dropdown option is mostly limited to adding CSS classes.
Today, let’s talk about giving users the ability to add custom attributes to an element, such as an ID, which can’t be done using the Formats dropdown.
We’ll need something similar to the “Insert/Edit Link” button, which means creating a brand new, custom TinyMCE button. Adding a new button can be done by creating a JavaScript plugin and using a WordPress hook to add it to the WYSIWYG editor.
Registering the New Custom WYSIWYG Button
First, we need to register the new button using the mce_buttons or the mce_buttons_2 filter.
(The only difference between the two filters is whether or not the button appears on the first row or second row of the editor.)
// Register new button in the editor
add_filter( 'mce_buttons_2', 'dgtlnk_register_mce_button' );
function dgtlnk_register_mce_button( $buttons ) {
     array_push( $buttons, 'dgtlnk_mce_custom_id' );
     return $buttons;
}
Then, we use the mce_external_plugins filter to load our custom TinyMCE plugin JavaScript file.
// Declare your custom mce-button script.
add_filter( 'mce_external_plugins', 'dgtlnk_add_tinymce_plugin' );
function dgtlnk_add_tinymce_plugin( $plugin_array ) {
     $plugin_array['dgtlnk_mce_custom_id_script'] = get_stylesheet_directory_uri() . '/assets/js/mce-button.js';
     return $plugin_array;
}
Now it’s time to create that JavaScript file, where we’ll define the button and the behavior for the button.
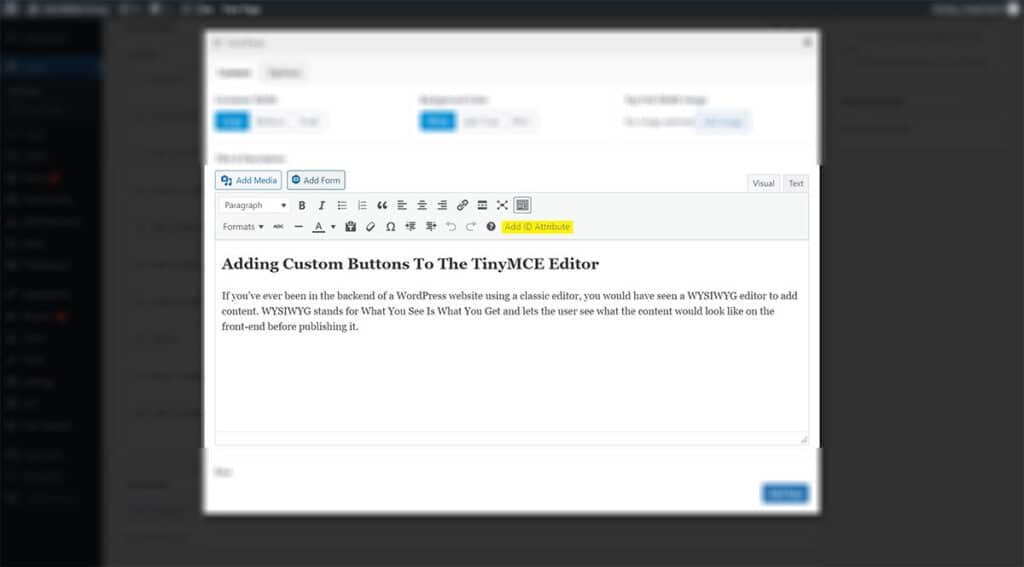
First, we create the dgtlnkMCEcustomid plugin and hook into the init function. Inside the init function, we add a button to the WYSIWYG editor using the addButton function (which takes the ID of the button as a parameter along with variables and functions associated with the button). Finally, the text variable defines the text for the button.
When you save the JavaScript file, you will see a button appear in the WYSIWYG editor.
(function() {
/* Register the buttons */
tinymce.create('tinymce.plugins.dgtlnkMCEcustomid', {
     init : function(editor, url) {
          editor.addButton( 'dgtlnk_mce_custom_id', {
          text: 'Add ID Attribute',
     },

     createControl : function(n, cm) {
          return null;
     },
});

/* Start the buttons */
tinymce.PluginManager.add( 'dgtlnk_mce_custom_id_script', tinymce.plugins.dgtlnkMCEcustomid );
})();
Creating the Button’s Function and Making it Work
In order to make the button work, we need to define an onclick event.
onclick: function() {
var selectednode = editor.selection.getNode();
editor.windowManager.open( {
title: 'Add ID',
body: [
{
type: 'textbox',
name: 'dgtlnkid',
minWidth: 300,
label: 'Custom ID',
value: selectednode.hasAttribute('id') ? selectednode.getAttribute('id') : '',
},
],
});
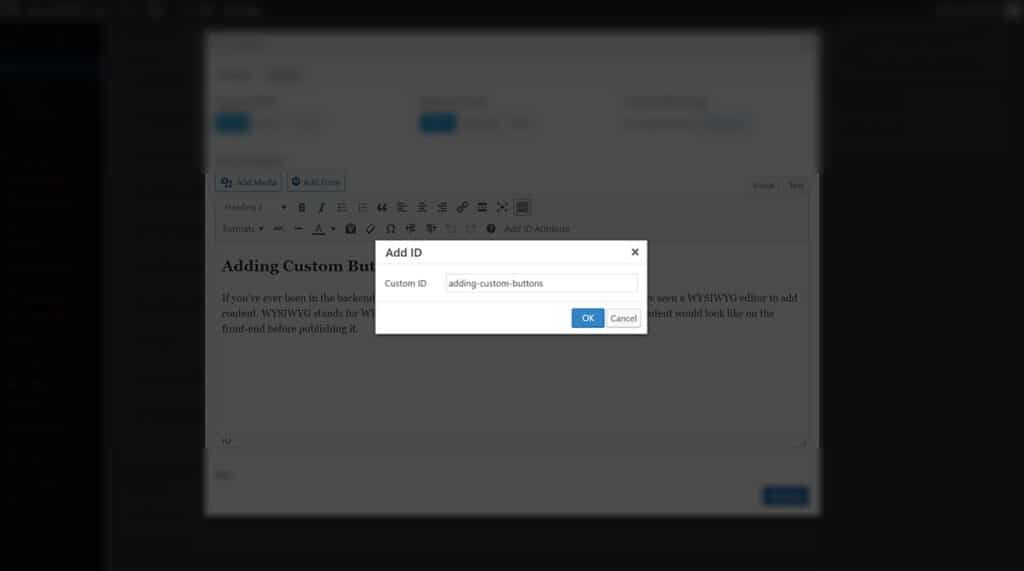
}In this onclick callback function, we save the current HTML node in the selectednode variable. Then, we’ll use the editor.windowManager.open method to open a modal window, displaying the title for the modal and the body for the content. Inside the body, we define the type of input field as a textbox, give it a name attribute of dgtlnkid, and define a minWidth and label for the input.
If the current HTML node – the selectednode – already has an ID, then we assign that as a value for the input so that it can be edited. If it doesn’t, we assign an empty value to the input.
Now, we need to define an onsubmit function that handles what happens when the modal form is submitted. The onsubmit function should be defined inside the editor.windowManager.open method.
onsubmit: function(e){
     if (e.data.dgtlnkid.length > 0) {
          selectednode.setAttribute('id', e.data.dgtlnkid);
     } else if (selectednode.hasAttribute('id')) {
          selectednode.removeAttribute('id');
     }
}
In this function, we first check to see if the input field is empty. If it is, we remove the id attribute from the current HTML node; if not, we assign it as an id attribute to the current HTML node.

Here is the full JavaScript code.
(function() {
/* Register the buttons */
     tinymce.create('tinymce.plugins.dgtlnkMCEcustomid', {
          init : function(editor, url) {
          editor.addButton( 'dgtlnk_mce_custom_id', {
          text: 'Add ID Attribute',
          onclick: function() {
               var selectednode = editor.selection.getNode();
               editor.windowManager.open( {
                    title: 'Add ID',
                    body: [
                         {
                         type: 'textbox',
                         name: 'dgtlnkid',
                         minWidth: 300,
                         label: 'Custom ID',
                         value: selectednode.hasAttribute('id') ? selectednode.getAttribute('id') : '',
                         },
                    ],
                    onsubmit: function(e){
                         if (e.data.dgtlnkid.length > 0) {
                              selectednode.setAttribute('id', e.data.dgtlnkid);
                         } else if (selectednode.hasAttribute('id')) {
                              selectednode.removeAttribute('id');
                         }
                    },
               });
          }
     });
},
     createControl : function(n, cm) {
          return null;
     },
});
/* Start the buttons */
     tinymce.PluginManager.add( 'dgtlnk_mce_custom_id_script', tinymce.plugins.dgtlnkMCEcustomid );
})();
When developing a new website, adding custom buttons to the TinyMCE editor is a great way to extend functionality and usability making it easier for users to update content.
If you need help extending the functionality of the WYSIWYG editor on your website or for any other digital marketing needs, reach out to us.