Creating Custom Admin Columns in WordPress
by Utsab Karki, Senior WordPress Developer
Insights / Website Design /

Photo by Lukas via Pexels
As a developer, one of the reasons I love working with WordPress is that it allows me to customize a website to fit any client’s needs.
When building a site, developers not only have to account for how the front-end of a website should function, but also how the back-end or administrative side of the website works. Ultimately, our goal is to make it easy for the person managing the website to keep it up-to-date and feel comfortable adding new content independently.
Viewing Taxonomies for Your Custom Post Types
One way to make managing content in a WordPress site smoother is by creating Custom Post Types (CPT) and custom taxonomies. You can read all about how to create custom post types and taxonomies here.
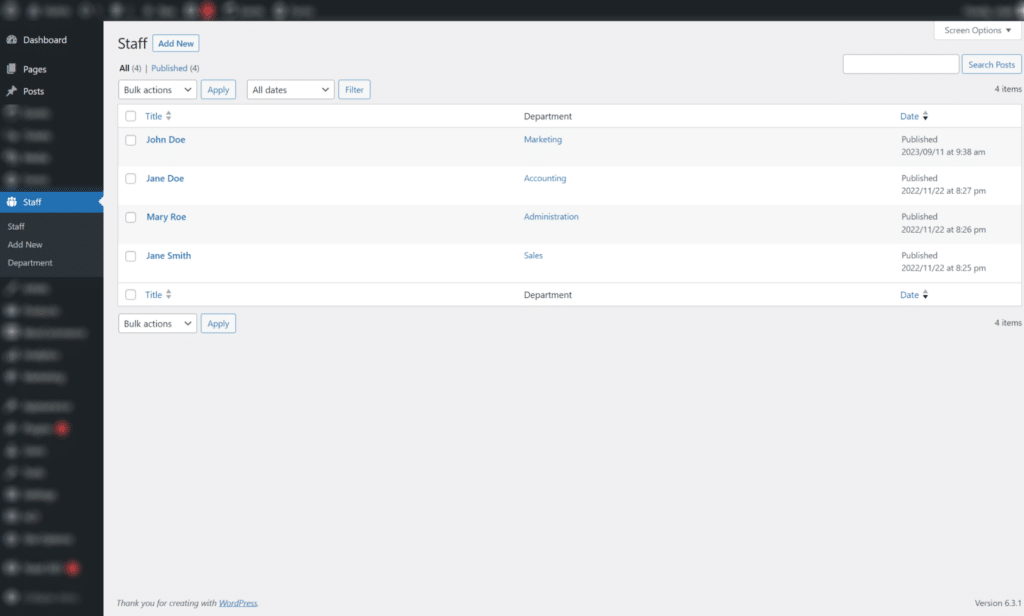
In the above article, Jason shares how to create a “Staff” CPT that can be used to enter data about each of your staff members. In the WordPress admin, when you view the list of staff members, you can see the title that was added for each staff member along with the date it was published.
Following the same article, let’s say you create a custom taxonomy for the Staff CPT called “Departments” in order to categorize the staff members according to their workgroup. After adding relevant departments and assigning the staff members to their departments, when you view the full list of Staff again, you can see the department each staff member is assigned to.
This is because the show_admin_column argument is set to true in the register_taxonomy function. If you set this argument to false, the ‘Department’ column will not render when viewing the staff members list in the admin.
Adding Custom Fields to the List View
Now that you have your custom post type and associated taxonomy, let’s assume you create a custom field in the backend to enter ‘Position’ for each staff member using a plugin like Advanced Custom Fields or using the add_meta_box function.
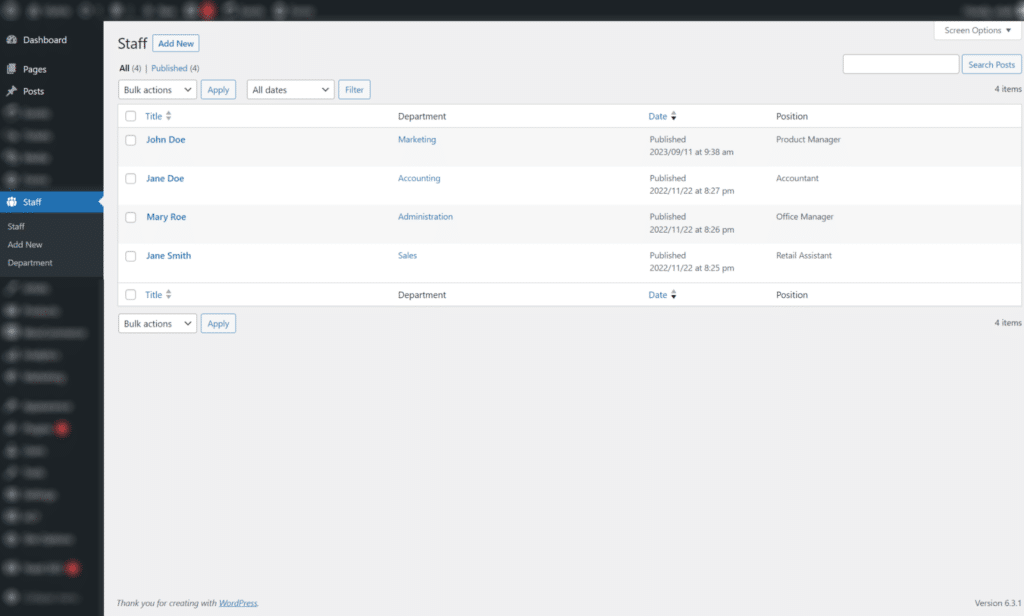
It would definitely be helpful to display this information when viewing the full Staff list.
One of the things that makes WordPress flexible and extendable is hooks. Hooks allow you to attach a callback function and add/update/modify another piece of code. In order to display the custom field’s information, we will need to use a couple of different hooks that WordPress provides. The first one is the manage_{$post_type}_posts_columns hook where $post_type refers to the post type slug.
function dgtlnk_add_staff_position_column ( $columns ) {
  return array_merge ( $columns, array (
    'position' => __ ( 'Position' )
  ) );
}
add_filter ( 'manage_staff_posts_columns', 'dgtlnk_add_staff_position_column' );
In the above hook, we use the dgtlnk_add_staff_position_column callback function, which takes an array of $columns as an argument, and merge it with an array containing ‘Position’ as a heading with the existing array of $columns. This hook only adds the column in the admin for ‘Position’ – now we need to add the data for each row.
To do that, we use the manage_{$post->post_type}_posts_custom_column hook to render the values. In this hook, the $post->post_type refers to the post type that it should hook into, which in our case is staff.
function dgtlnk_render_staff_position_column_values ($column, $post_id) {
  if ($column == ‘position’) {
    echo get_post_meta ($post_id, ‘staff_position’, true);
  }
}
add_action( ‘manage_staff_posts_custom_column’, ‘dgtlnk_render_staff_position_column_values’, 10, 2);
In the above hook, we use the dgtlnk_render_staff_position_column_values callback function, which is called for every ‘Staff’ column in the admin. The $post_id is the ID of each row being rendered. First, we check that the column is the correct column we want to render the output to, and then we echo the value of the custom field (in this case, staff_position) using the get_post_meta function.
After adding both of these hooks with the callback functions in your functions.php file, you will see the Position column along with the values for each staff being displayed in the admin when viewing the list of Staff members.
You can read more about both hooks in the WordPress Developer Resources.
Having relevant content readily available can help users not only on the front-end of a site but also on the back-end.
If you need help updating your WordPress site for a better user experience both on the front-end and back, then reach out to us – we’d be happy to assist you with your needs.


