Moving from Caldera Forms to Gravity Forms – What to Know

Last updated: March 31, 2022
Interactive forms are an important feature for most websites. Interactive forms are versatile and extremely useful and can be used to create contact forms, event registrations, questionnaire, and much more.
For years we’ve recommended that our clients use Caldera Forms to address all their interactive form needs. However, as of December 31, 2021, Caldera forms will be sunsetting.
This means that beginning January 1, 2022, Caldera Forms will no longer receive support or updates from its developers. Using a plugin that isn’t being supported by developers means the plugin will quickly become outdated and potentially as security risk.
Once we heard the announcement, we started migrating our forms and our clients’ forms to a new plugin called Gravity Forms.
Gravity Forms has proved to be a great feature. It’s simple to use and has tons of add-ons and third-party integrations. And while it bears many similarities to Caldera Forms, it does have some key differences.
To save you the trouble of figuring out what these differences are, we’re just going to tell you. Here’s what you should know…
Form Layout:
Adding Fields
In Caldera Forms, the basic form builder works like this: you drop a blank field onto the page and then specify the type of field you want from a menu of options. Gravity Forms saves you a step by presenting a menu of options that you drag and drop from directly.
Overall, Gravity Form’s fields straightforward and more user-friendly than Caldera’s.
Rows, Columns, and Field Size
In Caldera Forms, you work with rows and fields while building out your form. If you want to have a column layout, you have to take a row and split it into two columns, then drop fields into each column. However, Gravity Forms allows you to simply drag and drop fields wherever you want the new column to be.
Here’s how: Grab a field and drag it next to another field. When you let you, the fields will automatically resize to half their size in order to fit as two columns on one row.
You can feature up to four fields in a single row. From there, you can also adjust the Field Size to be small, medium, or large in the Field Settings.
Pages
If you’re interested in creating a multi-page form, you can still do so with Gravity Forms by selecting the Page field. This will create a section sandwiched within “Page Break” and “End Paging.” Simply drag and drop fields into this new section to build out your new page.
If you want to customize the “Next” and “Previous” buttons for each page, you can do so by clicking on “Page Break” and editing the button text in Field Settings.
Conditional Fields
Looking to create conditional fields? On Caldera Forms, this option exists in the “Conditions” tab where you create specific rules from scratch that you can apply to multiple fields. However, in Gravity Forms, you apply Conditional Logic to individual fields in the Field Settings.
Simply select a field, go to Field Settings, click “Conditional Logic” and then click “Enable Conditional Logic.” This will display the logic fields that you can then customize as needed.
Form Settings:
Anti-Spam Honeypot
Forms that are open to the public will inevitably get spammed. There are many ways to reduce spam, such as by including anti-spam honeypots. Honeypots are traps that are designed to identify spam bots. The honeypot is a hidden field that only bots can see and interact with, so there is no impact on user experience.
While this setting is set as a default on Caldera Forms, on Gravity Forms, you can choose to enable anti-spam honeypots in the Form Settings.
This is an option we recommend enabling on every Gravity Form you build.
Required Asterisk
In Gravity Forms, any field marked as required will have the word “(Required)” next to it. Personally, we think that this looks bulky compared to a simple asterisk (*). Fortunately, you can change this setting in Form Settings.
Ajax Submissions
Ajax, which stands for Asynchronous JavaScript And XML, is a feature that allows a webpage to update without reloading the page. This greatly improves user experience as it creates a seamless submission process with no interruptions.
If you’re looking to enable Ajax on your new Gravity Forms, the approach is a bit different than with Caldera Forms.
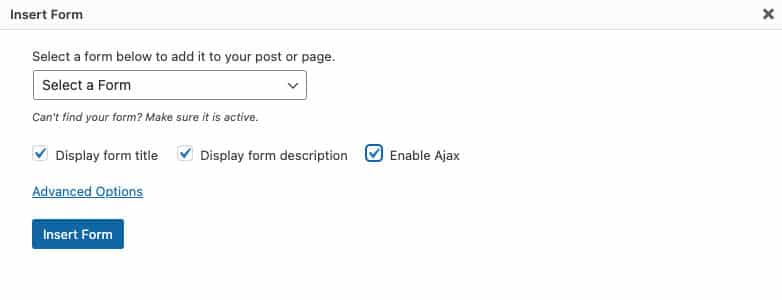
In Caldera Forms, the setting for enabling Ajax is found in Form Settings and is enabled as a default. However, in Gravity Forms, the option to Enable Ajax is only found when embedding a form on a page.
Confirmations & Notifications:
Confirmations
When creating a form, it’s important to include a Confirmation message or action that communicates to a user that their form submission was successful. Gravity Form’s default confirmation is:
Thanks for contacting us! We will get in touch with you shortly.
Of course, you can always edit this message to something else.
In Calder Forms, confirmation messages are found under “Form Settings.” However, Gravity Forms has a separate section devoted to Confirmations options. With Gravity Forms, you also have the option to create multiple confirmation messages that will appear depending on the Conditional Logic you specify.
Make sure to save after making your edits to the Confirmations.
Notifications
When a form is submitted, you’ll want to make sure that the right people are aware of the new entry. As a default, Gravity Forms sends form entries to WordPress’s primary administrator.
In Caldera Forms, this setting was adjusted in the “Email” section. However, in Gravity Forms it’s called “Notifications,” which is found adjacent to “Form Settings” and “Confirmations.” In Gravity Forms you have added flexibility to create multiple Notifications, based on Conditional Logic.
Make sure to save after making your edits to the Notifications.
If you have any questions about Gravity Forms, or need help building out a form, reach out to us!


